2 Proven Methods to Fix Blurry Pictures
Jun 14, 2023
iCrowdMarketing powered by iCrowdNewswire
Introduction
Sharp and crisp photos are every photographer's priority. But discovering the photos you spend time capturing are blurry pictures can be a total nightmare. It's one of the worst things you want to come back to see after completing an important shoot all day long.
We've created this comprehensive guide to walk you through the reasons why your photos might appear blurry and show you the best techniques to remove blur from photos without compromising the integrity of your photos. Let's dive into the article without any further ado.
Part 1. The Reasons That Lead to Blurry Pictures
Your blurry photos are usually due to common mistakes. Let's take a look at some of the most common reasons why your shots might appear as blurry pictures.
- Motion Blur:
One common cause of blurry pictures is motion blur. When the subject or the camera is in motion during the exposure, the resulting image can appear blurred. This can happen if the photographer's hands shake, or if the subject is moving quickly. To avoid motion blur, it is crucial to use techniques like image stabilization, tripods, or faster shutter speeds.
- Poor Air Quality
Another factor that can lead to blurry pictures is poor air quality. In situations where there is haze, smoke, or dust particles in the air, they can interfere with the clarity of the image. These particles scatter light and create a hazy effect, resulting in blurry photos.
- Poor Light Quality
Poor light quality can also contribute to blurry pictures. When there is insufficient light, the camera tends to compensate by using slower shutter speeds, which can introduce motion blur. In such situations, using a flash or increasing the ISO can help capture sharper images by providing adequate light.
- Inappropriate Focusing System
An inappropriate focusing system or missed focus can cause blurry pictures as well. If the camera fails to focus properly on the subject, the resulting image will lack sharpness. It is crucial to understand the autofocus system of the camera and ensure that the focus point is accurately set on the subject of interest.
- Poor Camera Holding Technique
Poor camera holding technique is another cause of blurry pictures. If the photographer does not hold the camera steady or has shaky hands, it can result in blurry images. Practicing proper handholding techniques, using camera stabilization tools, or employing techniques like bracing against a solid surface can significantly reduce camera shake.
- Not Using Auto-Focus
Autofocus helps to achieve accurate focus quickly, especially in situations where manual focusing may be challenging. Neglecting to use this feature when appropriate can lead to missed focus and blurry images.
- There's Dirt On Camera Lens
Even minor smudges or dust particles can interfere with the clarity of the photo. For this reason, it's usually advisable that you clean the camera lens with a soft cloth or lens cleaning solution to maintain clear and sharp images.
Part 2. How to Make A Blurry Picture Clear?
The best way to make a blurring picture clear is by using a powerful photo repair software, Wondershare Repairit Photo Repair. It’s a comprehensive photo repair software that uses advanced algorithms to fix different kinds of errors in photos, including blurriness.
Unlike regular photo repair tools, Repairit Photo Repair supports two repair modes, which are quick repair and advanced repair mode, allowing you to easily repair photos with any kind of damage flawlessly.
Key Features
- Smartly repair corrupted and damaged photos.
- Supports numerous image formats, including JPG, PNG, GPR, AWR, etc.
- Repair blurry pictures from any device, including Mac & Windows computers, digital cameras, USB flash drives, etc.
- Simultaneously repair multiple photos with high quality.
- Advanced repair mode allows you to fix photos with severe damages smoothly.
Step 1: Download and install the Wondershare Repairit on your PC or Mac.
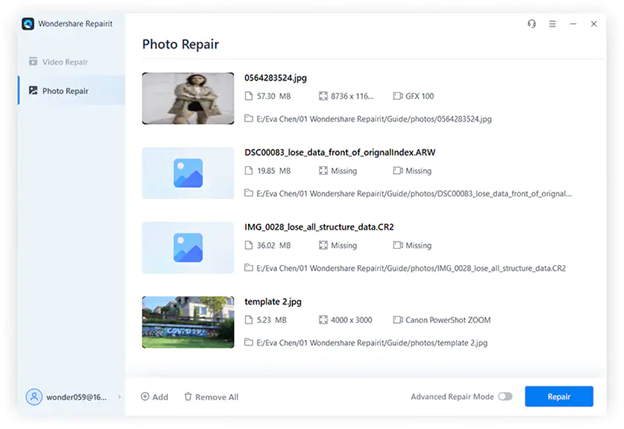
Step 2: Start the installed program and click Photo Repair from the top-left side. Click the Add button to upload the blurry photos that need to be fixed.

Step 3: Up next, click the Repair button to start repairing the uploaded photos.
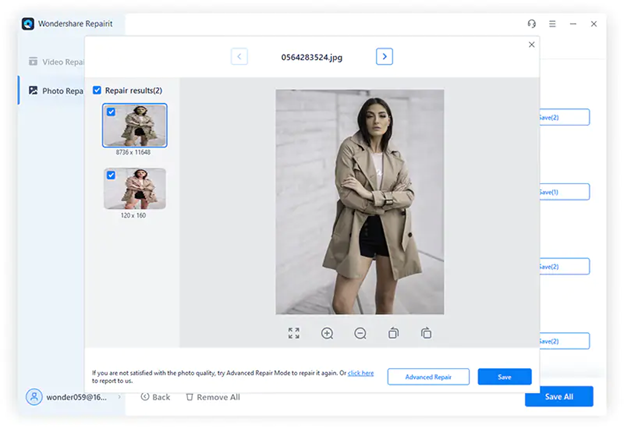
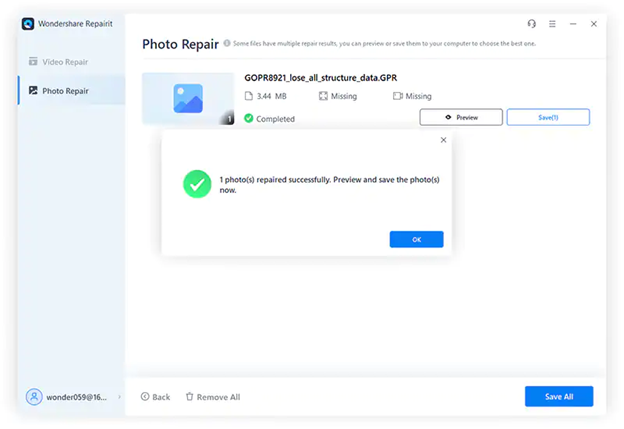
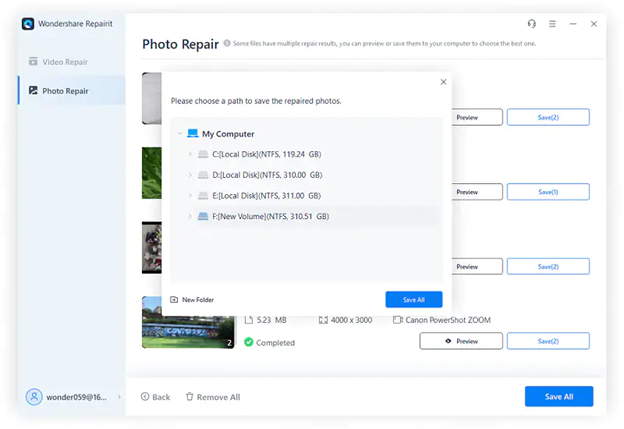
Step 4: The photo repair process should take only a few minutes to complete. Afterward, Preview the photos and save them to your local storage.

However, if your photos are severely blurry, you need to use the Advanced Repair mode to be able to perform an in-depth repair operation. The procedure below explains the process;
- Click Advanced Repair and upload a Sample photo. The sample photo is a good version of the blurry photo that you wish to repair created with the same device in the same format.
- Click Repair once you’ve uploaded the sample photos to start the advanced photo repair.
- After you complete the above, preview the photos and save them to your computer.
Part 3. How to Make A Blurry Picture Clear Online?
If you're looking for a safe and convenient way to enhance blurry photo online, Repairit Online Photo Repair is the best tool that can come in handy for the operation. This fully functional online photo repair tool allows you to simply upload your damaged photos and repair them automatically without reducing their initial quality.
Key Features
- Fix any level of photo corruption, including blurriness fast and efficiently.
- Supports advanced repair mode to fix severely damaged photos.
- Boasts the best security encryption to ensure secure photo recovery operation online.
- Supports popular video formats, including JPG and PNG.
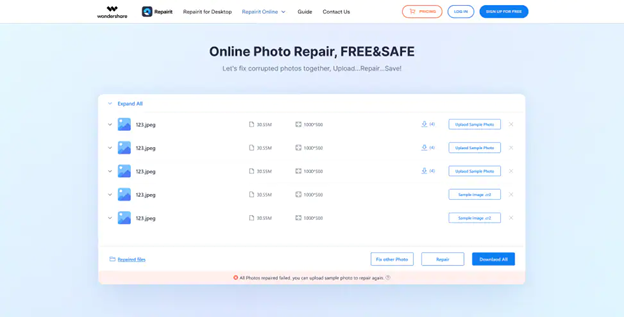
Step 1: Visit Wondershare Repairit Online Photo Repair tool in your browser and upload the blurry photos using the Add button.

Step 2: Similar to the Repairit Photo Repair Software for PC and Mac, Repairit Online Photo Repair supports two repair modes, “Quick Repair” and “Advanced Repair”.
For Quick Repair;
- Just click the Repair button at the bottom right corner and wait for the online tool to start the repair process.

For Advanced Repair
- If the Quick Repair is not efficient enough to fix blurriness, click on Upload Sample Photo and upload a sample photo for each of the photos that needs to be fixed.
- Click the Repair button to start repairing the photo. This should take a minute or two to complete.
Step 3: Lastly, preview the photo and save them to your device’s local storage using the Download button.
Part 4. Important Tips to Avoid Pictures Blurry Again
Blurriness can ruin your photos when it's involuntary. But there are numerous tips that can help you prevent such an error in your photos. This includes the following;
- Use techniques like image stabilization, tripods, or faster shutter speeds to minimize camera movement and capture sharper images.
- Always keep your hand steady when holding the camera.
- Ensure your camera is always focusing on the right area in the frame.
- Use the right auto-focus settings at all times.
- Use a smaller aperture when shooting.
- Ensure your lighting conditions are perfect when shooting.
- Clean dirt on your lens before taking any shot.
Conclusion
Blurry pictures can be a major disappointment for anyone. But you don't have to panic in such a situation.
By following the techniques and tips discussed in the article above, you should be able to remove blur from photos without requiring the help of an expert.